*By the AC Specialists at R & Y A/C Compressors | Family-owned and operated in Miami, FL since 1989 | Last updated: March 2026*
Quick Answer
A seized AC compressor — where internal parts have locked up and the shaft can no longer rotate — is almost always caused by oil starvation from a refrigerant leak, internal contamination, or prolonged inactivity. A seized compressor cannot be reliably repaired and must be replaced. The entire system must be flushed before installing the new unit to prevent repeat failure.
A seized AC compressor is one of the worst outcomes for your car’s air conditioning system. Unlike a clutch that will not engage or a slow refrigerant leak, a seized compressor often brings collateral damage. When the internal components lock up, metal debris spreads throughout the system, and the repair bill grows.
Understanding why compressors seize, recognizing the early warning signs, and knowing the correct replacement procedure can save you time and money. Here is what you need to know.
What Does “Seized” Actually Mean?
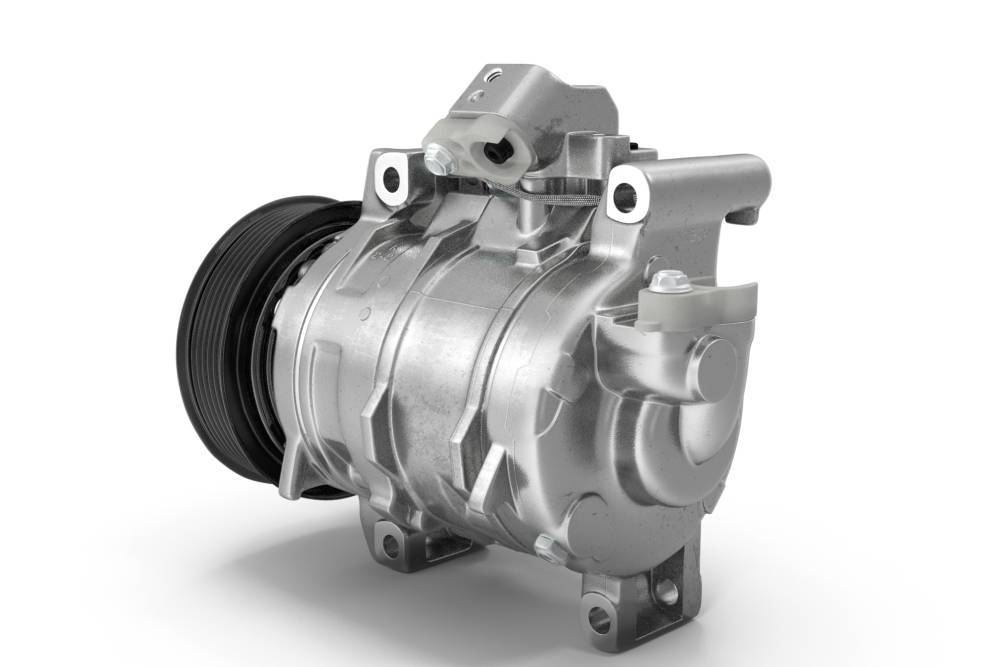
When an AC compressor seizes, the internal moving parts have locked together and can no longer rotate. The compressor is a pump with pistons, scrolls, or vanes that compress refrigerant gas. When these parts bind, the compressor shaft cannot turn.
This matters for two reasons. First, the AC system is completely nonfunctional. Second, because the compressor is connected to the engine via the serpentine belt, a fully seized compressor can stall the engine, snap the belt, or damage the belt tensioner and other belt-driven accessories.
Why AC Compressors Seize
Loss of Lubrication
This is the leading cause. The AC system relies on a specific amount of refrigerant oil (PAG or POE oil depending on the system) that circulates with the refrigerant. This oil lubricates the compressor’s internal bearings, pistons, and sealing surfaces.
When the system develops a refrigerant leak, it loses oil along with the refrigerant. Running the compressor with insufficient oil causes metal-on-metal contact, rapid wear, overheating, and eventually seizure.
Contamination and Debris
If a previous compressor failed and scattered metal particles through the system, those particles act as an abrasive inside the replacement compressor. This is one of the most common reasons new compressors fail prematurely. If the system was not properly flushed after the first failure, the replacement inherits the contamination.
Liquid Slugging
The compressor is designed to compress gas, not liquid. If liquid refrigerant reaches the compressor (due to a flooded evaporator, failed expansion valve, or overcharge), the incompressible liquid can hydraulically lock the pistons and break valves, connecting rods, or the crankshaft.
Prolonged Inactivity
Vehicles that sit unused for extended periods, particularly in humid climates, can develop internal corrosion inside the compressor. The oil settles, seals dry out, and moisture collects on metal surfaces. When the compressor is finally engaged, the corroded surfaces cannot move freely.
Bearing Failure
The main shaft bearing inside the compressor supports the rotating assembly. When it fails, the shaft can cock to one side, creating binding and friction that leads to seizure.
Warning Signs Before a Compressor Seizes
Compressors rarely seize without warning. Here are the symptoms that typically precede a lockup:
Unusual Noises
A compressor headed for seizure will often make grinding, knocking, or growling sounds in the weeks or days before it locks up. These noises indicate internal components are wearing and making contact they should not be making.
Intermittent Cooling
As internal clearances wear and valves begin to fail, the compressor loses efficiency. You may notice the AC is not as cold as it used to be, or that it cools well on some days but not others.
Clutch Slipping or Overheating
A compressor that is becoming increasingly difficult to turn will cause the clutch to slip. You may notice a burning smell from the belt area or see the clutch plate showing discoloration from heat.
Hard Belt Operation
If the serpentine belt squeals more than usual, especially when the AC kicks on, the compressor may be putting excessive drag on the belt. The belt tensioner may also appear fully extended, indicating the belt is under more tension than normal.
Visible Oil Leaks
Oil residue around the compressor, particularly at the shaft seal or hose connections, means refrigerant and oil are escaping. This is both a leak symptom and a warning that lubrication levels are dropping.
Can a Seized Compressor Be Fixed?
In most cases, a seized compressor needs to be replaced. Here is why:
- The internal damage from seizure is typically extensive. Scored cylinder walls, broken reed valves, shattered pistons, and galled bearings are common.
- Even if the compressor can be freed (some technicians have had success with penetrating oil and careful manual rotation), the damaged surfaces will shed more debris and fail again quickly.
- Remanufacturing is an option, but only for a professional rebuilder with the tools and knowledge to fully disassemble, inspect, and replace all worn components.
Attempting to free a seized compressor and put it back in service is not a reliable repair. The system deserves a properly rebuilt or new unit.
The Right Way to Replace a Seized Compressor
Replacing a seized compressor is more involved than a standard compressor swap because of the metal debris that has spread through the system. Skip any of these steps and you risk destroying the replacement compressor.
Step 1: Remove the Failed Compressor
Recover any remaining refrigerant with a recovery machine. Disconnect the hoses, remove the mounting bolts, and take the compressor out. Inspect the oil that drains from the suction port. If it is dark, contains glitter, or smells burnt, you have system-wide contamination.
Step 2: Flush the System
This is the most critical step. Metal debris from the seized compressor circulates through the hoses, condenser, and evaporator. Every flushable component must be cleaned with an approved AC system flush solvent.
What to flush:
- Suction line (low-pressure hose)
- Discharge line (high-pressure hose)
- Liquid line
- Evaporator (if accessible and flushable)
- Condenser (if flushable; many modern parallel-flow condensers cannot be effectively flushed and should be replaced)
Push the flush solvent through each component in the direction of normal refrigerant flow. Follow with compressed nitrogen or dry air to blow out all residual solvent and debris.
Step 3: Replace the Orifice Tube or Expansion Valve
The orifice tube or expansion valve is a filter point in the system. After a compressor seizure, it will be clogged with debris. Replace it with a new one. Do not attempt to clean and reuse it.
Step 4: Replace the Condenser (If Needed)
Many modern vehicles use multi-pass parallel-flow condensers with very small internal passages. These cannot be effectively flushed. If your vehicle has this type of condenser, replace it. Leaving a contaminated condenser in the system is the number one reason replacement compressors fail early.
Step 5: Replace the Accumulator or Receiver-Drier
The accumulator (on CCOT systems) or receiver-drier (on TXV systems) contains a desiccant bag that absorbs moisture. After a system breach or major repair, replace this component. The desiccant becomes saturated and ineffective when exposed to air.
Step 6: Install the New Compressor
Before installing the replacement compressor:
- Verify the correct amount of oil is in the new unit. Remanufactured compressors typically come pre-oiled, but you may need to adjust the oil charge based on how much oil was lost or how much remains in the system.
- Check that the clutch gap is within specification, typically 0.015 to 0.030 inches.
- Use new O-rings at all connections, lightly coated with refrigerant oil.
Step 7: Evacuate and Recharge
Pull a deep vacuum (500 microns or lower) and hold it for at least 30 minutes. This removes air and moisture. If the vacuum holds, recharge with the factory-specified amount and type of refrigerant. Verify operation by checking pressures, vent temperatures, and listening for abnormal noises.
How to Prevent Compressor Seizure
- Run your AC regularly, even in winter. This keeps the seals lubricated and prevents the oil from settling.
- Fix leaks promptly. A slow leak that goes unrepaired will eventually starve the compressor of oil.
- Use the correct oil. PAG 46, PAG 100, PAG 150, and POE oils are not interchangeable. Use what the manufacturer specifies.
- Flush the system after any compressor failure. Never install a new compressor into a contaminated system.
Frequently Asked Questions
: With the engine off, remove the serpentine belt and try to rotate the compressor clutch plate by hand. If it turns smoothly, the compressor is not seized — the issue is likely electrical (clutch not engaging). If it won’t rotate at all or feels extremely stiff and gritty, the compressor has seized.
A fully seized compressor can snap the serpentine belt since the belt can no longer drive a locked pulley. This leaves you without the alternator, power steering pump, and water pump, which can cause the engine to overheat. Turn off the AC immediately and stop driving if you suspect a seized compressor.
Yes, as a temporary measure to keep the vehicle drivable without AC. A bypass belt that routes around the compressor pulley allows you to run the other accessories. However, this is a short-term solution — get the compressor replaced.
The most common cause is that the system was not properly flushed before installation. Metal debris from the old failed compressor contaminated the new one. The second most common cause is incorrect oil charge — too little oil starves the new compressor just as it did the old one.
A seized compressor replacement costs more than a standard compressor swap because the system must also be flushed and the condenser may need replacement. Total cost is typically $800 to $2,000 at a shop, depending on the vehicle, whether the condenser needs replacement, and local labor rates.
A proper replacement including system flush, component replacement, evacuation, and recharge takes 4 to 8 hours at a shop. Rushing the job — particularly skipping the flush — is the primary cause of repeat compressor failure.
Get a Reliable Replacement
When your compressor has seized and you need a quality replacement, R & Y A/C Compressors has been the trusted source for remanufactured and new AC compressors since 1989. Every unit leaving our Miami facility is tested to meet OE performance standards. We also carry clutch assemblies, condensers, and other AC components to help you complete the job right the first time.
Enter your year, make, and model at rycompressors.com or contact us for expert guidance.