
How To Safely Flush Your Auto A/C System
To safely flush your auto A/C system, you must have the right knowledge and tools. Hiring a technician can be costly, which prompts many to do the repairs themselves. Below are the essential tips you’ll need to get started.
Make Sure The Vehicle Is Parked On An Even Surface
Before you start working on the A/C, you will want to be sure the car is situated on a surface which is even. Engage your parking brake while allowing the car’s engine to sit idle. Then activate the air conditioning and open up the hood.
Find The A/C Service Fittings
You’ll next need to identify the A/C service fittings. The fitting on the low side can typically be found near the refrigerant hose which extends from the car’s accumulator to its compressor. The fitting on the high side is usually situated near a refrigerant hose which extends from the car’s compressor to its condenser. Extract the service fitting’s plastic caps.
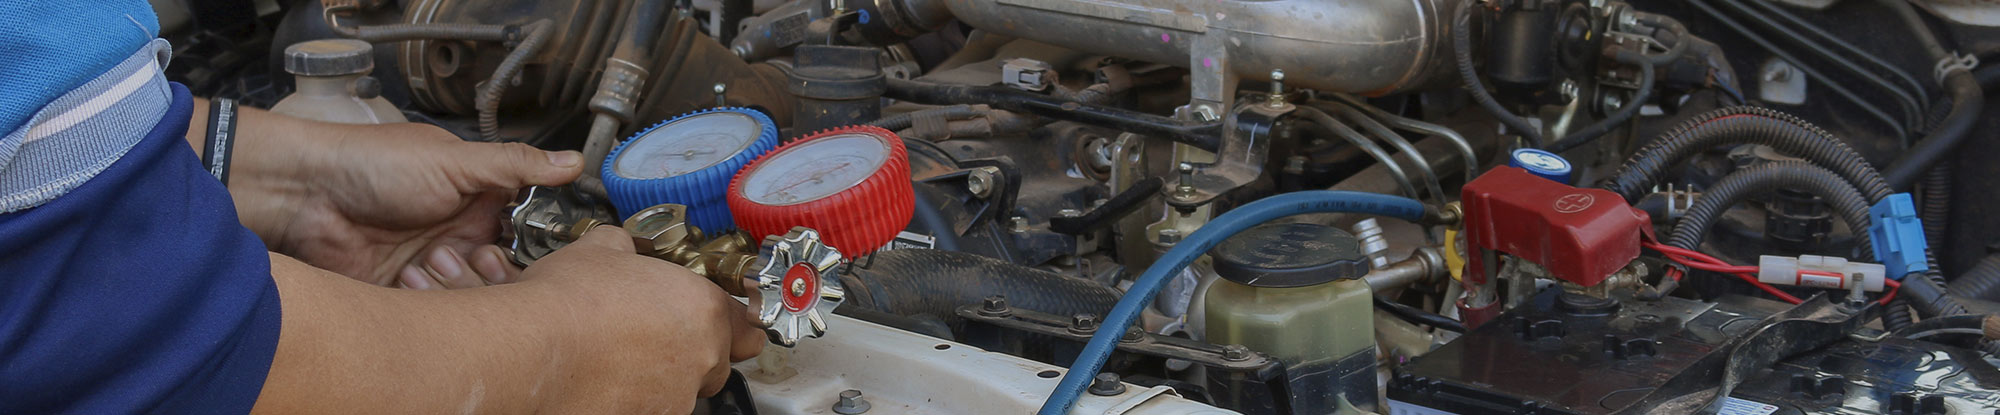
Attach The Blue Colored Hose To The Fitting On The Low Side
Take the blue colored hose which can be found on the car’s manifold gauges and then attach it to the fitting on the low side. The red colored hose (which can also be found on the car’s manifold gauge), should be attached to the fitting on the high side. The yellow colored hose must be attached to the car’s vacuum pump. Open the hose valves and then turn on the pump of the vacuum. Give the vacuum some time to thoroughly evacuate your A/C until the manifold gauge’s pressure readings show 0 psi. Now deactivate the pump, remove the service fitting hoses and shut off the car’s ignition.
Use An Adjustable Wrench When Disconnecting The Hoses
When disconnecting the refrigerant hoses on the high and low side of the condenser, it is important to use a wrench which is adjustable. Pour the solvent into the condenser’s inlet (on the high side), then apply some compressed air onto the same high side inlet. As the solvent is emitted from the condenser’s outlet hole, catch it with a rag that is nice and dense. Watch for grime or debris which is mixed into the solvent, and continue flushing your condenser until all of the debris is eliminated.
Remove The Mounting Bracket And The Accumulator
The mounting bracket can be found near the accumulator. Unscrew it and put aside its mounting bolts so you can find them when needed. Next you will need to remove your accumulator. Like the condenser this should be done with an adjustable wrench. Next you will need to remove the orifice tube. This can be done with a plier that has a needle nose. Inspect the tube for grime.
Replace The Accumulator And Attach The Refrigerant Can
Remove the pump of the vacuum (via the manifold gauge’s yellow hose) than attach the can of refrigerant to the hose which is yellow. Activate the ignition, then the A/C and switch the settings to the highest level. Open the valves for pressure on the blue and yellow hose and let the A/C system recharge.