*By the AC Specialists at R & Y A/C Compressors | Family-owned and operated in Miami, FL since 1989 | Last updated: March 2026*
Quick Answer:
To find a car AC refrigerant leak, start with a visual inspection for oily residue, then use UV dye with a UV flashlight or an electronic leak detector for small leaks. The most common leak locations are O-ring connections, the compressor shaft seal, the condenser, and the evaporator. Always repair the leak before recharging — topping off without fixing the cause just delays the problem.
If your car’s AC starts blowing warm after it used to be ice cold, a refrigerant leak is the most likely cause. Automotive AC systems are sealed, but they are not indestructible. Vibration, heat cycling, road debris, and simple age all take their toll on the hoses, O-rings, seals, and components that make up the system.
Finding the leak is often the hardest part of the repair. Refrigerant is invisible when it escapes, and the leak may be tiny. But with the right approach and a few diagnostic tools, you can track it down.
How to Know You Have a Leak
Before you start looking for a leak, confirm that the system is actually low on refrigerant. Here are the signs:
- AC blows cool but not cold. A partially charged system can still cool somewhat.
- AC blows cold intermittently. The compressor may short cycle as the low-pressure switch cuts it on and off.
- AC does not work at all. If enough refrigerant has escaped, the low-pressure switch will prevent the compressor from engaging entirely.
- Visible oil residue. Refrigerant oil travels with the refrigerant. Where refrigerant leaks out, it often leaves an oily film.
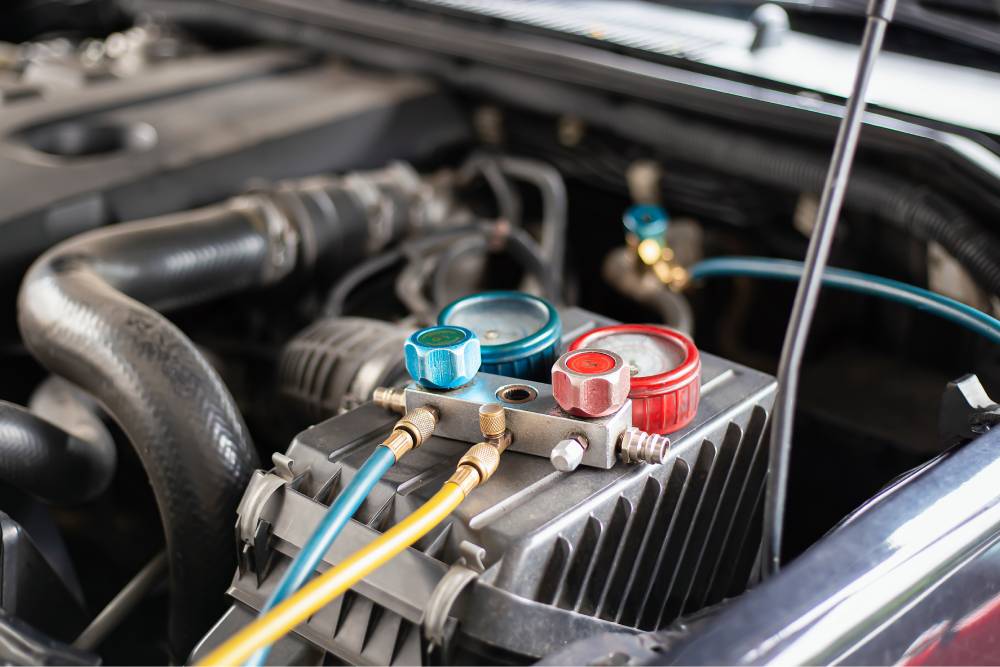
Connect a manifold gauge set to confirm. If the static pressure (engine off) reads significantly below what ambient temperature would predict, or if the low side drops too quickly when the compressor runs, you are dealing with a low charge.
Common Leak Locations
Refrigerant can leak from anywhere in the system, but some spots are far more common than others. Check these areas first:
Compressor Shaft Seal
The front shaft seal on the compressor is one of the most common leak points. This seal sits where the clutch shaft exits the compressor housing. Over time, the seal dries out and cracks, especially in vehicles that do not use the AC regularly. Regular AC use keeps the seal lubricated.
What to look for: Oily residue around the front of the compressor where the shaft meets the housing.
Schrader Valve Service Ports
The service ports where you connect your gauge set or recharge hose have small Schrader valves (similar to tire valve stems). These can develop slow leaks, especially after repeated connections and disconnections.
What to look for: Oil residue around the service port caps. You can also apply soapy water and watch for bubbles with the system charged.
O-Ring Connections
Every hose and line connection in the system uses an O-ring seal. There are typically six to ten of these connections throughout the system. They can leak when the O-ring hardens, cracks, or when the connection loosens from vibration.
What to look for: Oil stains at any connection point where hoses meet components.
Condenser
The condenser sits in front of the radiator and takes a beating from road debris. Rocks, gravel, and other objects can puncture the thin aluminum tubes.
What to look for: Oil spots or wet areas on the face of the condenser, especially in the lower half.
Evaporator
The evaporator is hidden inside the dash, which makes it the hardest component to inspect. It can develop pinhole leaks from corrosion, often caused by moisture and organic debris that accumulates on its surface.
What to look for: A sweet or chemical smell inside the cabin, oily residue on the condensation drain under the vehicle, or a foggy windshield when the AC first turns on.
Hoses and Lines
Rubber hoses degrade over time. The high-pressure liquid line and the low-pressure suction hose can develop cracks, especially at the crimped fittings where rubber meets metal.
What to look for: Oil stains, soft spots, or visible cracks on hoses.
Leak Detection Methods
Method 1: Visual Inspection
Start simple. With good lighting and clean components, do a thorough visual inspection of every connection, hose, and component surface. Refrigerant oil leaves a telltale oily residue that collects dust and dirt, making leak sites appear as dark, greasy spots.
Best for: Large leaks or leaks that have been present for a while.
Method 2: UV Dye Detection
UV dye is one of the most reliable methods for finding AC leaks of all sizes.
How to do it:
- Inject UV dye into the AC system through the low-side service port using a dye injection kit.
- Run the AC system for 15 to 30 minutes to circulate the dye.
- Using a UV flashlight (also called a black light), inspect every component, connection, and hose in the system.
- The dye glows bright yellow-green under UV light at the leak location.
Tips for best results:
- Use the UV light in a shaded or dark area for maximum contrast.
- Wear UV-blocking safety glasses to protect your eyes and improve visibility of the dye.
- Check everywhere, including under the vehicle at the evaporator drain.
- For very slow leaks, you may need to drive the vehicle for a few days before the dye accumulates enough to be visible.
Best for: Small to medium leaks. This is the preferred method for most professional shops.
Method 3: Electronic Leak Detector
An electronic refrigerant leak detector is a handheld device that senses refrigerant gas in the air. You slowly move the probe tip around each component and connection. When it detects refrigerant, it signals with a beep or light.
How to do it:
- Make sure the system has at least some refrigerant charge. The detector needs escaping gas to find.
- Turn the detector on and let it calibrate in clean air, away from the vehicle.
- Slowly trace every connection, seal, and component surface with the probe tip, holding it within a quarter inch of the surface.
- Move slowly. The most common mistake is sweeping the probe too fast and missing a small leak.
- When the detector alarms, narrow down the exact location by moving the probe around the area.
Tips for best results:
- Work in a still area without wind, which disperses the refrigerant and creates false negatives.
- Start at the top of the engine bay and work down, since R-134a and R-1234yf are both heavier than air and can pool in low spots, creating misleading readings.
- Replace the sensor element in your detector per the manufacturer’s schedule. A worn sensor loses sensitivity.
Best for: Pinpointing active leaks. Works well in combination with UV dye.
Method 4: Soapy Water (Bubble Test)
The simplest and cheapest detection method. Apply soapy water to suspected leak areas and watch for bubbles.
How to do it:
- Mix a solution of dish soap and water, or use a commercial leak detection solution.
- Apply it to connections, hose fittings, and the compressor shaft seal with a spray bottle or brush.
- Watch for bubbles forming, which indicate escaping gas.
Best for: Confirming a suspected leak location, especially at service ports and O-ring connections. Not practical for hard-to-reach areas or very slow leaks.
Method 5: Nitrogen Pressure Test
For systems that have lost all their refrigerant, there may not be enough pressure for the above methods to work. In that case, a shop can pressurize the system with dry nitrogen to a test pressure and monitor for pressure drop, then use soapy water or an electronic detector to find the leak under nitrogen pressure.
Best for: Systems that are completely empty. This is a professional shop procedure.
How to Fix AC Leaks
The repair depends on the location and severity of the leak.
O-Ring Replacement
If the leak is at a hose connection, replacing the O-ring usually solves the problem. Always use O-rings designed for AC systems (typically green HNBR material rated for R-134a or R-1234yf). Apply a thin coat of refrigerant oil to the new O-ring before assembly.
Schrader Valve Replacement
Leaking service port valves can be replaced with a special valve core removal tool, often without evacuating the entire system.
Hose Replacement
Cracked or damaged hoses need to be replaced entirely. Use hoses rated for your system’s refrigerant type. Barrier-style hoses are less permeable and have a longer service life.
Compressor Shaft Seal
A leaking shaft seal usually means it is time to replace or remanufacture the compressor. While shaft seal kits exist, accessing and replacing the seal is labor-intensive, and the result is not always reliable.
Condenser or Evaporator Replacement
Punctured or corroded condensers and evaporators cannot be reliably patched. Replacement is the proper repair. Evaporator replacement is especially labor-intensive because it requires removing the dashboard.
After the Repair
Once the leak is fixed, the system needs to be properly serviced:
- Evacuate the system with a vacuum pump to remove air and moisture. Pull a vacuum to at least 500 microns and hold it for 15 to 30 minutes to verify no leaks.
- Recharge with the manufacturer-specified amount of refrigerant and the correct type and amount of oil.
- Verify operation by checking pressures, vent temperatures, and compressor behavior.
Frequently Asked Questions
You can, but it is only a temporary fix. The refrigerant will continue to leak out, and you will need to recharge again. More importantly, refrigerant carries compressor oil — a slow leak gradually starves the compressor of lubrication, eventually causing it to seize. Find and fix the leak rather than repeatedly topping off.
UV dye is permanent — it stays in the system until the refrigerant is recovered. This is actually useful because if a slow leak develops in the future, it will show up with a UV light inspection without needing to add more dye. Most shops add dye during any recharge as a standard practice.
Yes. The most common AC leaks are from O-rings and seals that deteriorate naturally from age, heat cycling, and ozone exposure. Small refrigerant molecules can also permeate through older rubber hose materials over years of use, causing slow but continuous loss.
A properly sealed system should lose very little — roughly 0.5 oz per year is considered normal permeation through hoses. If you are losing enough to notice reduced cooling within a season, you have a leak that should be found and repaired.
It depends heavily on the location. O-ring or Schrader valve repairs are $50–$150. Hose replacement is $150–$400. Condenser replacement runs $300–$700 including labor. Evaporator replacement is $600–$1,500 because it requires dashboard removal. Compressor shaft seal (usually requires full compressor replacement): $500–$1,200.
Most professional technicians advise against AC stop-leak products. They can clog the expansion valve, contaminate the refrigerant oil, damage rubber seals elsewhere in the system, and ruin AC service equipment at the shop. Proper leak repair is always the correct approach.
Keep Your AC System Sealed and Cold
Finding a refrigerant leak takes patience, but the right tools and a systematic approach will get you there. If your compressor has been damaged from running low on refrigerant, or if you need any AC components for the repair, R & Y A/C Compressors has you covered. We have been remanufacturing and supplying AC compressors and components from our Miami facility since 1989.
Enter your year, make, and model at rycompressors.com to find your parts or contact our team for help with your repair.