
*By the AC Specialists at R & Y A/C Compressors | Family-owned and operated in Miami, FL since 1989 | Last updated: March 2026*
Quick Answer
Honda Civic AC compressor problems vary by generation — the 8th gen (2006–2011) is known for clutch bearing and coil failures; the 10th gen (2016–2021) sees internal compressor failures from 60,000–100,000 miles; the 11th gen (2022+) uses R-1234yf refrigerant. Total replacement cost at an independent shop runs $700–$1,100 with a remanufactured compressor. Always replace the drier and expansion valve at the same time.
The Honda Civic is one of the best-selling cars in American history, and for good reason. It is reliable, fuel-efficient, and affordable to maintain. But even a Civic’s AC system will eventually need attention, and the compressor is often the component that fails first.
Whether your Civic’s AC is blowing warm air, making strange noises, or has stopped working entirely, this guide will help you diagnose the problem, understand your repair options, and know what to expect for cost.
Common Honda Civic AC Compressor Problems by Generation
Different generations of the Civic tend to develop different AC issues. Here is what to watch for based on your model year.
8th Generation (2006-2011)
The 8th-gen Civic is known for AC compressor clutch failures. The clutch is the component that engages and disengages the compressor from the engine’s drive belt. Common issues include:
- Clutch bearing failure: A whining or grinding noise that changes when the AC is turned on or off. The bearing wears out over time and eventually seizes.
- Clutch coil burnout: The electromagnetic coil that engages the clutch can burn out, preventing the compressor from activating. You will hear the AC fans running but feel no cold air.
- Compressor shaft seal leaks: The shaft seal where the clutch attaches to the compressor body is a common leak point, especially on higher-mileage examples.
9th Generation (2012-2015)
The 9th-gen Civic uses R-134a refrigerant and is generally reliable, but some owners experience:
- Refrigerant leaks at the compressor body: Small leaks develop at the compressor housing gaskets or the service port Schrader valves.
- Condenser damage: The condenser sits at the front of the car and is vulnerable to road debris. A damaged condenser leads to refrigerant loss and AC failure that may be mistakenly attributed to the compressor.
- Expansion valve issues: A stuck expansion valve restricts refrigerant flow and puts excessive strain on the compressor, leading to premature failure.
10th Generation (2016-2021)
The 10th-gen Civic, including the popular turbocharged 1.5L models, uses R-134a and introduced some new considerations:
- Compressor internal failure: Some owners report compressor failures between 60,000 and 100,000 miles. Internal components break down and send metallic debris through the system, contaminating the condenser and expansion valve.
- Electrical connector issues: Corroded or loose connections at the compressor clutch connector can prevent engagement.
- Software-related AC cycling: Some early 10th-gen models had ECU calibration issues that caused the compressor to cycle on and off too frequently, reducing cooling performance. Dealer software updates addressed this.
11th Generation (2022-Present)
The current Civic uses R-1234yf refrigerant, which is more environmentally friendly but requires different service equipment. AC issues are less common on these newer models, but early reports include:
- Sensor calibration problems causing the AC to blow inconsistent temperatures
- Condenser leaks from road debris impacts
- Higher refrigerant costs for R-1234yf when service is needed
Symptoms of a Failing Honda Civic AC Compressor
Regardless of generation, a failing AC compressor usually announces itself with one or more of these symptoms.
Warm Air from the Vents
This is the most obvious sign. If the AC is set to maximum cold and the air coming from the vents is lukewarm or warm, the compressor may not be functioning. However, warm air can also result from low refrigerant, a faulty blend door actuator, or a clogged expansion valve, so proper diagnosis is important.
Unusual Noises
- Clicking or clunking when AC is turned on: The compressor clutch is engaging but may be worn or damaged.
- Grinding or squealing: Internal compressor bearings are failing. This noise often gets worse over time and may be present even when the AC is off if the clutch bearing is the source.
- Rattling at idle: Loose compressor mounting bolts or a worn clutch assembly.
AC Clutch Not Engaging
When you turn on the AC, the compressor clutch should engage with an audible click, and the center of the clutch pulley should start spinning with the outer ring. If the center is not spinning:
- Check the AC fuse and relay first
- Verify the system has adequate refrigerant (low charge triggers a safety switch that prevents compressor engagement)
- Test the clutch coil with a multimeter for proper resistance (typically 3 to 5 ohms)
- Check for voltage at the clutch connector with the AC commanded on
Refrigerant Leaks
Green or oily residue around the compressor, hose fittings, or condenser indicates a refrigerant leak. The oily residue is compressor oil that escapes along with the refrigerant. Leaks can be confirmed with a UV dye test or an electronic refrigerant leak detector.
AC System Short Cycling
If the compressor engages for a few seconds, then disengages, then engages again repeatedly, the system may be low on refrigerant, the compressor may have an internal issue, or the high-pressure switch may be triggering due to a condenser airflow problem.
Diagnosing Honda Civic AC Problems
Before replacing the compressor, make sure it is actually the problem. Here is a practical diagnostic approach:
- Check the obvious first. Verify the AC fuse and relay are good. Check that the cabin air filter is not clogged (a restricted filter reduces airflow but does not affect compressor function).
- Listen for the clutch. With the engine running and AC on max, listen for the clutch engaging. Have someone toggle the AC on and off while you watch the compressor clutch.
- Check refrigerant charge. Connect a manifold gauge set to the high and low service ports. For R-134a on a Civic, normal operating pressures are roughly:
– Low side: 25 to 35 psi
– High side: 200 to 250 psi (varies with ambient temperature)
- Inspect for leaks. Use a UV light to check for dye traces (many systems have dye added from the factory or during previous service). Check the compressor shaft seal, hose connections, condenser, and evaporator drain.
- Test compressor clutch circuit. Verify 12V is reaching the clutch connector when the AC is commanded on. If voltage is present but the clutch does not engage, the coil or clutch is faulty.
- Evaluate compressor condition. If the compressor engages but pressures are abnormal (low side too high, high side too low), the compressor may have internal valve or seal damage and is no longer compressing effectively.
Honda Civic AC Compressor Replacement: What You Need
If diagnosis confirms a compressor failure, here is what the replacement job involves.
Parts Needed
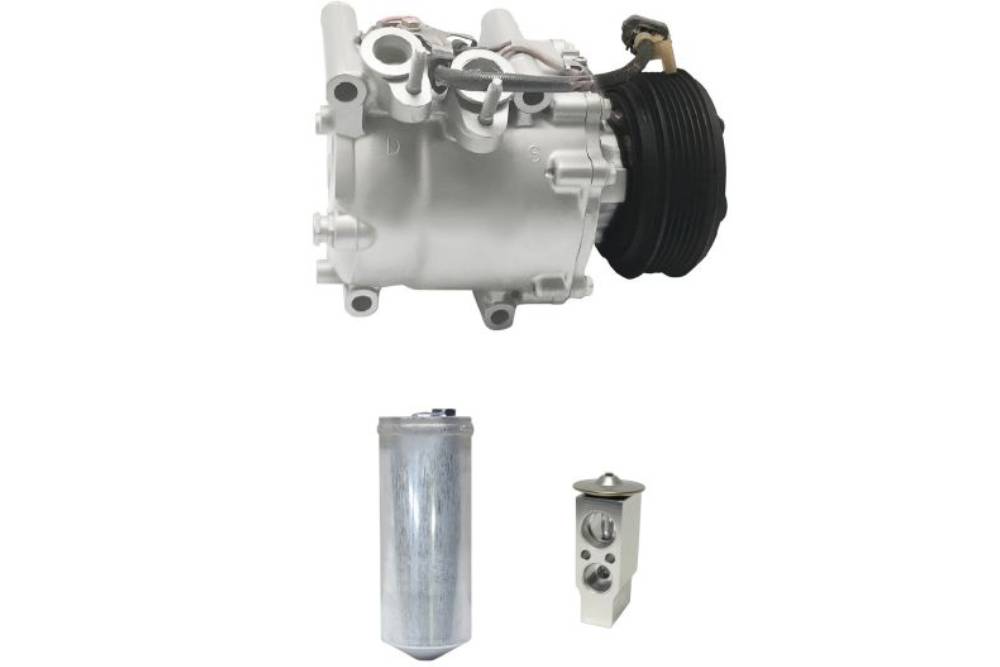
- AC compressor: New or remanufactured unit specific to your Civic’s year, engine, and refrigerant type
- Receiver/drier or accumulator: Always replace this when replacing the compressor. It filters debris and removes moisture from the system.
- Expansion valve or orifice tube: Replace this as well, especially if the old compressor failed internally and may have sent debris downstream.
- Refrigerant oil: The correct type and amount for your system (PAG 46 for most R-134a Civics, POE oil for R-1234yf)
- Refrigerant: R-134a or R-1234yf depending on model year
- O-rings: New O-rings for all connections being opened
- Condenser: If the compressor failed internally, the condenser should be replaced or thoroughly flushed to remove metallic debris. Replacing is safer.
Labor Overview
The general steps for a Civic AC compressor replacement are:
- Recover existing refrigerant using approved equipment
- Remove the serpentine or AC drive belt
- Disconnect the refrigerant hoses from the compressor
- Disconnect the electrical connector
- Remove the compressor mounting bolts
- Install the new compressor with fresh O-rings and the correct amount of oil
- Replace the receiver/drier and expansion valve
- Reconnect all hoses and the electrical connector
- Reinstall the drive belt
- Evacuate the system (pull a vacuum for at least 30 minutes to remove air and moisture)
- Charge with the correct amount of refrigerant
- Test the system for proper operation and check for leaks
Honda Civic AC Compressor Replacement Cost
Professional Repair Cost
| Component | Cost Range |
| AC compressor (remanufactured) | $200 – $400 |
| AC compressor (new OEM) | $350 – $650 |
| Receiver/drier | $30 – $80 |
| Expansion valve | $30 – $70 |
| Refrigerant and oil | $40 – $80 |
| O-rings and misc. | $15 – $30 |
| Labor (3-5 hours) | $300 – $600 |
| Total | $615 – $1,510 |
Most Honda Civic owners can expect to pay between $700 and $1,100 at an independent shop using a quality remanufactured compressor.
DIY Cost
If you have AC service equipment (manifold gauges, vacuum pump, refrigerant scale), you can save the labor cost. Parts alone typically run $350 to $650 for a complete kit including the compressor, drier, expansion valve, oil, refrigerant, and O-rings.
Note that federal law requires proper refrigerant recovery before opening the AC system. You cannot legally vent refrigerant to the atmosphere.
Tips for a Successful Honda Civic AC Repair
- Always replace the drier and expansion valve when replacing the compressor. Reusing contaminated components is the leading cause of repeat compressor failures.
- Flush the system if the old compressor failed internally. Metallic debris left in the lines or condenser will destroy the new compressor.
- Use the correct oil type and amount. Over-oiling or under-oiling the system causes performance problems and can damage the compressor.
- Pull a proper vacuum. At least 30 minutes at 500 microns or below. This removes all moisture that could freeze and block the expansion valve.
- Verify the charge amount. Use a refrigerant scale and charge by weight according to the specification on your underhood AC label.
Frequently Asked Questions
At an independent shop using a remanufactured compressor, expect to pay $700–$1,100 total including parts and labor. Using a new OEM compressor raises the total to $900–$1,500. DIY parts cost $350–$650 if you already own AC service equipment.
The 8th gen (2006–2011) is most known for clutch and bearing failures. The 10th gen (2016–2021), particularly the 1.5T models, sees more internal compressor failures between 60,000 and 100,000 miles. All generations can develop AC issues as mileage accumulates; proper maintenance reduces the risk.
Yes, replacing just the clutch assembly (bearing, coil, or full clutch kit) is possible and less expensive than full compressor replacement, provided the compressor body itself is not damaged internally. If the bearing has been noisy for a long time, inspect the compressor for internal scoring before installing a new clutch.
This intermittent cooling is often caused by a low refrigerant charge that causes the compressor to short-cycle (the low-pressure switch cuts it off when charge drops too low). It can also be caused by a failing expansion valve that freezes and restricts flow, then thaws and restores flow. Have the system pressure-tested and leak-inspected.
Quality remanufactured and new compressors typically come with some oil pre-installed, but the amount varies. Check the documentation included with your specific compressor. R & Y remanufactured compressors come pre-oiled with the correct type and quantity of oil for your application, so no additional oil needs to be added to the compressor itself.
With proper maintenance, a Civic AC compressor commonly lasts 100,000–150,000 miles or more. Running the AC regularly (even in winter to lubricate seals), replacing the cabin filter on schedule, addressing refrigerant leaks promptly, and keeping the condenser clean all extend compressor life significantly.
If the old compressor failed internally — making grinding or metal-on-metal noises — replacing the condenser is strongly recommended. Metal debris from the failed compressor circulates through the system and lodges in the condenser’s tiny passages. Flushing rarely removes all of it, and the leftover debris will destroy the new compressor.
Get Your Honda Civic AC Compressor from R & Y A/C Compressors
R & Y A/C Compressors stocks remanufactured and new AC compressors for every generation of the Honda Civic. Our Miami-based team has been helping DIY mechanics and shops find the right parts since 1989. Every compressor we sell is tested and comes with a warranty for your peace of mind. Visit rycompressors.com to search by your Civic’s year and engine, or call us for help selecting the right compressor and related components for a complete repair.